


Your shopping cart is currently empty.
Electric-Over-Hydraulic Trailer Brake Actuator Setup: Controller, Wiring, Breakaway and Bleeding
An electric-over-hydraulic actuator, often shortened to EOH, is a small electric pump that powers a trailer's hydraulic brakes. Instead of using the trailer's push like a surge actuator, it takes the signal from the brake controller in the tow vehicle and turns it into brake fluid pressure at the calipers or wheel cylinders. It needs an EOH-compatible brake controller, plus the right wiring, battery-backed breakaway system and bleeding procedure.
This guide walks through setting up a DeeMaxx electric-over-hydraulic actuator: picking the right model, the brake controller, power and ground wiring, the breakaway system, brake lines and fluid, bleeding, and setting controller gain. The setup information comes from the DeeMaxx EOH Brake Actuator Product Manual (Rev. 3-3-25), the DeeMaxx actuator flyer, DeeMaxx's actuator product descriptions and DeeMaxx's disc brake installation instructions. Use this as an overview, not a substitute for the instructions supplied with the exact components on your trailer.
Key takeaways
- The controller must be set to EOH. DeeMaxx says the tow vehicle must have a factory or aftermarket brake controller set to EOH (electric-over-hydraulic). Failure to do so can damage the unit and cause unreliable braking, and it is excluded from the actuator warranty.
- Use a proportional controller. DeeMaxx says the actuator performs best with a proportional, inertia-type in-cab controller. Non-proportional controllers are unsuitable and may damage the actuator. The controller must have an output capacity of at least 5 amps.
- Power and ground need heavy wire. The black power and white ground wires must be 12 gauge minimum on a 25-40 amp circuit. DeeMaxx recommends 10 gauge minimum for best performance, and a 40 amp circuit below 0 degrees F.
- A battery breakaway system is required. DeeMaxx says an emergency breakaway system with battery backup must be used, with a 12 volt battery of at least 5 amp-hours, fully charged before the trailer is towed.
- Use DOT 3 or DOT 4 fluid, never Super DOT 4 or DOT 4+. Bleed starting at the wheel farthest from the actuator, with the breather cap removed. DeeMaxx recommends bleeding new disc brake trailers twice.
Terms used in this guide
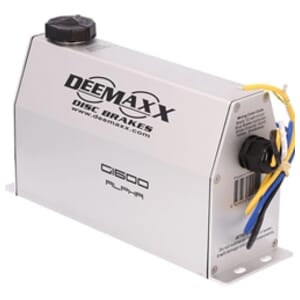
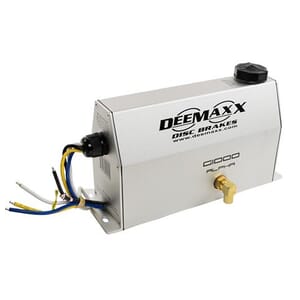
- Electric-over-hydraulic (EOH) actuator: An electric motor and pump with its own fluid tank, mounted on the trailer. When the brake controller sends a signal, it pumps brake fluid pressure to the trailer's hydraulic brakes.
- In-cab brake controller: The controller in the tow vehicle that sends the braking signal. A proportional controller sends more signal the harder the tow vehicle stops. DeeMaxx calls the best match a "proportional, inertia-type" controller.
- Gain: The controller setting that sets how hard the trailer brakes apply.
- Built-in compatibility adapter: DeeMaxx says all of its Generation 2 and 3 actuators have one built in. DeeMaxx's product descriptions list it on the EOHA1000, EOHA1600 and EOHA1600XL.
- Breakaway switch: A switch on the trailer with a cable to the tow vehicle. If the trailer separates, the cable pulls the pin and the breakaway battery runs the actuator to apply the brakes.
- Cold side of the breakaway switch: The switch terminal that goes to the actuator. It only has power when the breakaway pin is pulled.
- Breather cap: The vented cap on the actuator's fluid tank. DeeMaxx says it must be removed while bleeding.
- psi: Pounds per square inch, the brake pressure the actuator is built to produce.
Step 1: Pick the actuator for your brakes
DeeMaxx builds its actuators by brake type and pressure. DeeMaxx says to check with your brake manufacturer for the proper operating pressure, and that it is the installer's job to make sure the output pressure is correct and the model fits the trailer. If the brake system is over-pressurized, it can malfunction.
| DeeMaxx actuator | Pressure as printed | Use as DeeMaxx describes it | Model (for reference) |
|---|---|---|---|
| Drum brake actuator | 1000 psi | Hydraulic drum brakes on single or tandem axles; the flyer says drum brakes with 8k or lower axles | EOHA1000 |
| Heavier drum brake actuator | 1200 psi | The flyer says drum brakes with 8k or higher axles | TR-EOHA1200 |
| Disc brake actuator | 1600 psi | Hydraulic disc brakes on single or tandem axles; fluid capacity 15.7 fl. oz. | TR-EOHA1600 |
| Disc brake actuator, larger tank | 1600 psi | Hydraulic disc brakes on triple axles or more; fluid capacity 28.7 fl. oz. | EOHA1600XL |
Table note: Pressures and uses come from the 2024 DeeMaxx actuator flyer and DeeMaxx's product descriptions. The flyer lists the larger-tank disc model as TR-EOHA1600X, and the DeeMaxx manual covers the Alpha G1000, G1600 and G1600X and says the G-1600X suits quad axle trailers. The Southwest Wheel listings linked here are the 1000 psi drum and 1600 psi disc actuators. Confirm the exact model and required fluid volume for your trailer rather than treating the X, XL and G-series names as interchangeable.
Match both brake type and the brake manufacturer's required operating pressure; do not substitute a drum model for a disc model or the reverse. If you are choosing disc brakes for the trailer at the same time, see How to Choose a DeeMaxx Disc Brake Kit: Slip-Over vs Integral, Capacity and Axle Count. Check the contents of the exact kit before ordering separate components; a package may already include its actuator, lines and breakaway equipment.
Step 2: Check the brake controller
The actuator only does what the controller tells it to. DeeMaxx's rules for the controller:
- The tow vehicle must have a factory or aftermarket brake controller set to EOH (electric-over-hydraulic) mode.
- If you use the factory controller, confirm with the vehicle manufacturer that it can support electric-over-hydraulic towing, especially on a 2016 model or older.
- A proportional, inertia-type in-cab controller gives the best performance. Non-proportional controllers are unsuitable and may damage the actuator. DeeMaxx says the actuator must not run continuously at full pressure while the tow vehicle is stopped.
- The controller must have an output capacity of at least 5 amps.
- If your controller is not an inertia type, turn the gain down when you are stopped in traffic for long periods so the actuator does not overheat.
Shop Brake Controllers and check the controller's own instructions for an electric-over-hydraulic setting.
Step 3: Mount the actuator
DeeMaxx leaves the mounting location up to the owner, with these points to consider:
- Keep the wiring between the tow vehicle and the actuator as short as possible to limit voltage drop.
- Mount the breakaway system where its cable can easily reach the tow vehicle.
- The third-generation unit meets IP67 water intrusion standards and can handle brief water exposure, but do not power wash it, do not leave it submerged, and do not spray water directly on it when washing the trailer. That can cause a malfunction and may void the warranty.
- Do not drill holes in the housing or weld on or near the unit. Remove the actuator from the trailer before any welding, repairs or modifications.
Step 4: Wire power, ground, controller and breakaway
The DeeMaxx actuator has four wires. From the DeeMaxx manual:
| Wire color | Connects to | What DeeMaxx says |
|---|---|---|
| Black | 12 volt power from the tow vehicle | 25-40 amp, 12 volt supply. 40 amp required below 0 degrees F (-18 C). |
| Blue | Brake output of the in-cab controller | Connect to the blue (brake signal) wire from the in-cab electronic brake controller. |
| White | Ground | Must connect directly to the tow vehicle ground. The troubleshooting guide says directly to the tow vehicle battery ground. |
| Yellow | Breakaway switch | Connect to the cold side of the trailer emergency breakaway switch. |
Table note: Wire size for the black power and white ground: 12 gauge minimum, properly terminated to a 25-40 amp circuit; 10 gauge minimum for best performance. DeeMaxx also says a fuse rated at 30-40 amps in the tow vehicle is advisable, and to confirm that fuse with the vehicle maker for your wiring gauge.
Two wiring mistakes damage the electronics, according to DeeMaxx:
- Never connect the blue and yellow wires to each other.
- Never ground the blue wire or the yellow wire.
Undersized wire adds resistance and can keep the unit from working correctly or make the brakes slow to respond.
Step 5: Install the breakaway system
DeeMaxx says an emergency breakaway system with battery backup must be used with its actuator. The breakaway is not optional on this system.
- Use a 12 volt breakaway battery of at least 5 amp-hours. Keep it fully charged at all times; the trailer cannot be towed unless the breakaway system works and the battery is fully charged.
- Charge the battery from the tow vehicle only with the charging device included with the breakaway system.
- Mount the switch and battery on the trailer following the breakaway system's own instruction sheet.
- Wire the actuator's yellow wire to the cold side of the breakaway switch.
The breakaway is not a parking brake. DeeMaxx says the actuator does not provide a parking brake function and is a secondary source of braking that supports the tow vehicle's brakes. For breakaway kits with a battery and charger, see Breakaway Kits, including the top load LED breakaway kit and charger with a 4 ft. zip cable that our electric-over-hydraulic DeeMaxx kits list.
Step 6: Connect brake lines and fill with fluid
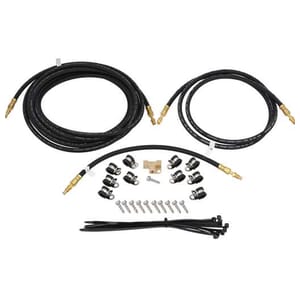
If the trailer has no brake lines, DeeMaxx says you need enough 3/16 in. automotive brake line to connect the brakes to the actuator. Lines smaller than 3/16 in. can delay braking.
- Connect the brake line to the 3/16 in. inverted flare adjustable fitting that screws into the actuator outlet port. The flyer notes DeeMaxx offers a 360-degree brake line position connection.
- Use brake line compatible with DOT 3 or DOT 4 fluid.
- The manual lists one liter of new brake fluid among the installation materials; this is not the actuator reservoir capacity. DeeMaxx calls for DOT 3 or DOT 4. Do not use Super DOT 4 or DOT 4+.
- Fill the tank to the bottom of the alloy filler neck. Do not overfill; it can damage the finish. Wash off any spill right away and avoid skin contact with the fluid.
- Always use new fluid from a sealed container. Never reuse old or dirty fluid.
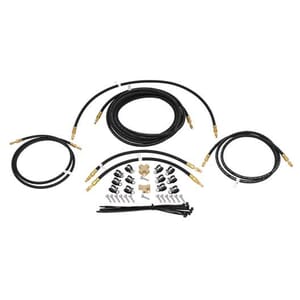
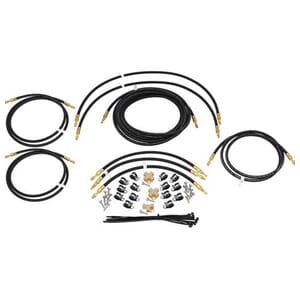
DeeMaxx brake line kits are sold by axle count: 18 ft. single axle, 20 ft. tandem axle and 20 ft. triple axle.
Step 7: Test the electric and hydraulic operation
Before bleeding, DeeMaxx has you confirm the unit runs on both power sources:
- Hook the trailer to the tow vehicle, but do not plug in the trailer connector yet.
- Pull the breakaway switch. The actuator should run. You will hear a hum that changes pitch as the unit pressurizes. If it does not run, check the breakaway battery and wiring.
- Reset the breakaway switch to turn the actuator off.
- Plug the trailer connector into the tow vehicle.
- Press the manual activation button on the in-cab controller. The actuator should run and pressurize.
DeeMaxx notes this only shows the unit is running, not that the brakes are working correctly. Regular inspection, adjustment and maintenance are still needed.
Step 8: Bleed the brakes
Air in the lines causes delayed braking. Before you start, DeeMaxx says:
- Two people make bleeding faster: one runs the actuator and one works the bleeder valve.
- On drum brakes, set the shoes to the clearance the brake maker specifies first. Badly adjusted drum brakes respond slower.
- Do not let the actuator run out of fluid. Check and top up often during bleeding.
- Remove the breather cap while bleeding. Put it back only when bleeding is done.
DeeMaxx's 8 steps:
- Put clear plastic tubing on the bleeder nipple of the caliper or wheel cylinder.
- Put the free end of the tube in a clean container partly filled with brake fluid.
- Open the bleeder on the caliper or wheel cylinder farthest from the actuator. On multiple axles, always start with the wheel farthest from the actuator.
- Turn the ignition on and run the actuator with the controller's manual activation button or the trailer breakaway switch. Pressing the tow vehicle brake pedal will not work with most controllers while stopped.
- Watch the tube for air bubbles. As soon as the bubbles stop, close the bleeder.
- Turn the actuator off and remove the tube. That brake is done.
- Refill the actuator with brake fluid.
- Repeat at each wheel, always moving to the next farthest one from the actuator.
DeeMaxx recommends doing the whole bleeding procedure twice on new trailers fitted with disc brakes.
Step 9: Set the controller gain
- Set the gain on the in-cab controller to a mid-range setting.
- Drive with the trailer at 15 to 20 kph (about 9 to 12 mph).
- Apply the brakes. If braking is too hard, turn the gain down and retest. If it is too soft, turn the gain up and retest.
- Repeat the manufacturer's adjustment test until the braking pressure is set correctly, without wheel lockup or skidding.
DeeMaxx says the right setting changes with load weight, weather and road conditions, so retest every time you use the trailer. DeeMaxx's disc brake installation instructions also say to adjust gain without wheel lockup or skidding.
Troubleshooting: brakes slow or actuator will not run
DeeMaxx's troubleshooting guide starts with the basics:
- Check the wiring against the color code above.
- Re-bleed the brakes. Air in the lines causes delay.
- On drum brakes, re-adjust the shoes to the trailer maker's tolerances.
- Check for undersized trailer wiring and brake lines smaller than 3/16 in.
- Make sure the white ground runs directly to the tow vehicle battery ground.
With the trailer safely attached to the tow vehicle, the trailer plug disconnected and a fully charged breakaway battery, the manual uses the breakaway switch to help isolate a fault. If the actuator runs and builds pressure on breakaway power but not in normal use, DeeMaxx says the likely cause is the controller or the wiring between it and the actuator. If it runs but builds no pressure, the unit may be faulty. Have a qualified technician follow the complete troubleshooting procedure; a running motor alone does not prove that the trailer can stop safely.
DeeMaxx asks that these troubleshooting steps be done before any warranty claim, and says disassembly by anyone other than an authorized DeeMaxx technician voids the warranty.
DeeMaxx electric-over-hydraulic kit examples
Choose wheel-end parts by axle capacity, rotor style, spindle fit and axle count, then confirm the actuator, line routing and breakaway equipment for the complete system. These are kit examples, not universal fits:
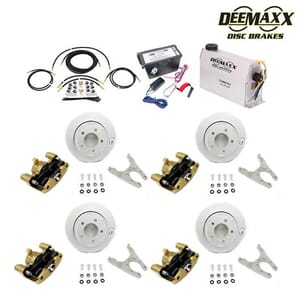
- 3,500 lb. tandem-axle slip-over disc brake kit with gold zinc calipers and EOH actuator (DMK35RG2), shown in the featured image.
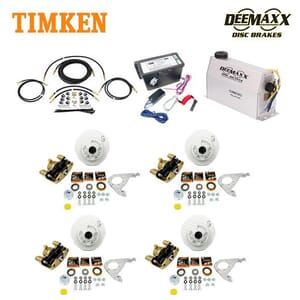
- 3,500 lb. tandem-axle integral disc brake kit with gold zinc calipers, Timken bearings and EOH actuator (DMK35IG2-TK). Its saved listing includes the TR-EOHA1600 actuator, DOT-TA20K brake line kit and 2311-ZIP4 breakaway kit.
The 3,500 lb. figure identifies the axle application; it is not a new rating for the complete loaded trailer. Match the kit to the axle and wheel-end specifications before ordering.
Electric-over-hydraulic setup checklist
- Brake type (drum or disc), axle count and the brake maker's pressure rating.
- Actuator matched to the brakes: 1000 psi drum or 1600 psi disc for single or tandem axles.
- In-cab controller set to EOH, proportional, with at least 5 amps of output.
- Black power and white ground in 12 gauge minimum (10 gauge preferred) on a 25-40 amp circuit; 40 amp for below 0 degrees F.
- White ground straight to the tow vehicle battery ground.
- Blue to the controller output; yellow to the cold side of the breakaway switch; blue and yellow never joined or grounded.
- Breakaway kit with a fully charged 12 volt battery of at least 5 amp-hours and its own charger.
- 3/16 in. brake lines and the 3/16 in. inverted flare outlet fitting.
- About one liter of new DOT 3 or DOT 4 fluid (not Super DOT 4 or DOT 4+).
- Breather cap off for bleeding, farthest wheel first, twice on new disc brake trailers.
- Gain test at 15 to 20 kph, retested with every trip.
Safety note
Brakes are safety equipment. DeeMaxx says a qualified person must install the actuator, and that incorrect installation or maintenance can cause the unit to malfunction and lead to severe or fatal injuries and property damage. Follow the manual that comes with your actuator, brakes, controller and breakaway kit, and have the finished system checked by a qualified brake technician before towing. Southwest Wheel sells new parts and does not provide installation or brake bleeding service.
Frequently asked questions
How is an electric-over-hydraulic actuator different from a surge actuator?
A surge actuator uses the trailer's push against the hitch to work a master cylinder. An electric-over-hydraulic actuator uses an electric pump that runs on the signal from the tow vehicle's brake controller. For surge systems, see How Surge Brake Actuators Work and How to Pick One.
Can I use my regular electric brake controller?
DeeMaxx says the actuator works with many electric brake controllers, but the controller must be set to EOH, should be proportional (best is a proportional, inertia-type), and must have at least 5 amps of output. Non-proportional controllers are unsuitable. If you use a factory controller, confirm EOH support with the vehicle maker, especially on a 2016 model or older.
What brake fluid does a DeeMaxx actuator use?
New DOT 3 or DOT 4 from a sealed container. DeeMaxx says not to use Super DOT 4 or DOT 4+, and never to reuse old or dirty fluid.
Do I need a breakaway battery?
Yes. DeeMaxx requires an emergency breakaway system with battery backup, using a 12 volt battery of at least 5 amp-hours, fully charged before every tow.
Why does the brake pedal not run the actuator when I bleed the brakes?
DeeMaxx says pressing the tow vehicle brake pedal will not work with most controllers while the vehicle is stopped. Use the controller's manual activation button or pull the trailer breakaway switch with the ignition on.
Why are my brakes slow to respond?
DeeMaxx lists air in the lines, drum brakes out of adjustment, undersized trailer wiring, brake lines smaller than 3/16 in. and a ground that does not go directly to the tow vehicle battery as common causes. Re-bleed and check the wiring first.
Can I pressure wash the actuator?
No. DeeMaxx says its third-generation unit meets IP67 standards for brief water exposure, but not to power wash it, submerge it for long periods or spray water directly on it.
References
- DeeMaxx Components. EOH Brake Actuator Product Manual, Alpha G1000, G1600, G1600X (Rev. 3-3-25): important notes, installation, electrical requirements, color code, operation test, bleeding, gain testing, troubleshooting and limited warranty.
- TRP / DeeMaxx. DeeMaxx Electric-Over-Hydraulic (EOH) Brake Actuators flyer (2024): features and model pressures.
- DeeMaxx Components. EOHA1000, EOHA1600 and EOHA1600XL product descriptions: brake type, axle count, pressure and fluid capacity.
- DeeMaxx Components. Disc Brake Installation Instructions: connecting brake lines, bleeding, and test and adjust.
- Southwest Wheel product listings for DeeMaxx actuators, electric-over-hydraulic disc brake kits, brake line kits and breakaway kits (titles and kit contents as listed).
Related guides
- How Surge Brake Actuators Work and How to Pick One
- How to Choose a DeeMaxx Disc Brake Kit: Slip-Over vs Integral, Capacity and Axle Count
- How to Choose a TruRyde Drum Brake Kit: Electric vs Hydraulic, Capacity and Axle Count
- What Lights a Trailer Needs: Sealed LED vs Incandescent
- Trailer Grease Seal Sizes: Double Lip vs Triple Lip
- Trailer Hub Bearing Adjustment and Grease, Step by Step
Find the right electric-over-hydraulic actuator
Have your brake type, axle count, brake maker's pressure rating and brake controller model ready when you shop or call.
Shop DeeMaxx Electric Over Hydraulic Actuators
Building a complete disc brake system? See DeeMaxx Trailer Disc Brakes, including the electric-over-hydraulic kits for 3,500 lb. slip-over, 3,500 lb. integral, 5,200 lb., 7,000 lb. and 8,000 lb. axles.
Call Southwest Wheel at 1-800-866-3336.
Southwest Wheel - Your Trailers Best Friend Since 1919.


