

Your shopping cart is currently empty.
Trailer Axle Alignment and Uneven Tire Wear: What to Check Before Replacing an Axle
Uneven tire wear on a trailer is easy to blame on the axle. Sometimes the axle is the problem. Often it is not. Tire pressure, load, a worn suspension part, loose bearings or brakes that lock up can all chew up a tire, and a new axle will not fix any of those. This guide walks through what Dexter says to check first: the wear pattern, tire pressure and load, how the axle is squared to the trailer, and the suspension parts that hold it there. Then it covers when to take the trailer to an alignment shop, and when replacing the axle actually makes sense.
On a Dexter axle, always follow Dexter's instructions. Where a Dexter bulletin and the catalog or manual disagree, the bulletin is the newer instruction. If you already know the axle has to go, start with How to Identify Your Old Trailer Axle and Order a Dexter Replacement.
Key takeaway
- Read the wear pattern first. Dexter's Tire Wear Diagnostic Chart ties each pattern to a cause. Only two of the six patterns point to an alignment shop: side wear and toe wear.
- Pressure comes first. Dexter calls tire inflation pressure the most important factor in tire life. Check it cold, and check it weekly while the trailer is in use.
- Measure before you blame the axle. Dexter says the axle must sit square to the trailer centerline within plus or minus 1/2 degree, and tandem axles must be parallel within 1/16 inch at the wheel centers.
- Inspect the suspension. Worn hanger holes, shackles, bolts and equalizers can let an axle sit out of square. Dexter says to inspect suspension parts at least every 6,000 miles.
- Know what an alignment shop is for. For side wear and toe wear, Dexter's chart action is "Align at alignment shop."
Alignment, camber, offset and track are different things
These words get mixed up. They are not the same check, and they do not have the same fix.
- Axle alignment (tracking): Where the axle sits on the trailer. Dexter says the axle must be placed perpendicular to the centerline of the trailer so it tracks properly. On a tandem or triple, the axles must also be parallel to each other.
- Toe: Whether the tires point slightly in or out when viewed from above. Dexter's chart lists incorrect toe-in as the cause of toe wear.
- Camber: A slight arch built into the axle tube so the tires stand more upright when the trailer is loaded. Camber is built into the beam at the factory. You choose it when you order a custom beam. It is not something you set when you install the axle. See Overslung vs Underslung and Camber: Spring Seat Options for a Custom Dexter Axle.
- Wheel offset: Where the wheel's mounting face sits compared with the rim centerline. That is a wheel question, not an axle question. See Trailer Wheel Offset: What Dexter Recommends and How to Match a Replacement Wheel.
- Track: A measurement, the center of one tire to the center of the other tire. It is not the same as hub face, and it is not the same as tracking.
Step 1: Read the wear pattern
Dexter's service manual includes a Tire Wear Diagnostic Chart. Here is what it says, pattern by pattern.
| Wear pattern | Cause, per Dexter | Action, per Dexter |
|---|---|---|
| Center wear | Over inflation | Adjust pressure to the particular load per the tire catalog |
| Edge wear | Under inflation | Adjust pressure to the particular load per the tire catalog |
| Side wear | Loss of camber or overloading | Make sure the load does not exceed the axle rating. Align at an alignment shop |
| Toe wear | Incorrect toe-in | Align at an alignment shop |
| Cupping | Out of balance | Check bearing adjustment and balance the tires |
| Flat spots | Wheel lockup and tire skidding | Avoid sudden stops when possible and adjust the brakes |
Four of the six patterns have nothing to do with where the axle sits. Center and edge wear are pressure. Cupping points to bearing adjustment and balance. Flat spots point to brakes. Fix those first.
Dexter also warns that tire wear should be checked often. Once a wear pattern is firmly established in a tire, it is hard to stop, even after the cause is corrected.
- For cupping, check bearing adjustment with Trailer Hub Bearing Adjustment and Grease, Step by Step.
- For flat spots, see brake setup and adjustment in Electric Brakes on a Custom Dexter Axle.
Step 2: Check tire pressure and load
Dexter calls tire inflation pressure the most important factor in tire life. Its guidance:
- Set pressure as the tire manufacturer recommends for the load.
- Check pressure cold, before you tow.
- Do not bleed air from tires when they are hot.
- Check pressure weekly while the trailer is in use.
- Make sure the tire will carry the rated load. If the load is not equal on all tires, use the tire rated for the heaviest wheel position.
Side wear can come from overloading, not only from alignment. Dexter's first action for side wear is to make sure the load does not exceed the axle rating. For how capacity is figured, see Choosing Trailer Axle Capacity: Hitch Weight, GAWR, Wheels and Tires.
Step 3: Measure axle position
If pressure, load, bearings and brakes check out and the wear still looks like side or toe wear, check where the axle sits on the frame.
What Dexter's applications guide says
Dexter's applications guide, LIT-008-00, page 19 (Axle Alignment), says:
- To ensure proper tracking, the axle must be placed on the frame perpendicular to the centerline of the vehicle, within plus or minus 1/2 degree.
- For multiple axles, each axle must be parallel with the others within 1/16 inch, measured at the wheel centers.
- Measure from the front cross member only if that cross member has been checked for squareness to the frame centerline. Any error in the cross member is transferred to the axle and can result in poor tracking and excessive tire wear.
What Dexter's service manual says
The 2,000 to 8,000 lb. Axle Service Manual, page 63 (Axle and Suspension Installation), says responsibility for proper axle alignment lies with the axle installer. It says proper alignment allows good control when cornering, longer tire wear, and eliminates dog tracking. That page describes measuring from the center of the trailer king pin to the center of each end of the axle, with a difference of no more than 1/16 inch. For multiple axles, it says the difference between the end centers of one axle and the end centers of the other must not vary more than 1/8 inch.
Where a Dexter bulletin and the catalog disagree, the bulletin is the instruction to follow.
Measuring tips
- Measure from a reference you know is square to the trailer centerline. Do not assume a cross member is square.
- On long measurements, Dexter's service manual (in its Airflex axle adjustment steps, page 70) suggests dropping plumb lines from the reference point and from the center of each spindle end, then marking and measuring on the floor so a sagging tape does not throw off the reading.
- Never go under a trailer unless it is properly supported on jack stands rated for the load. Do not lift or support the trailer on any part of the axle or suspension.
If the axle sits out of square, ask why before you move or replace it. A hanger welded in the wrong place, the wrong spacing, or worn parts can all leave a good axle sitting crooked. For spacing, see Hanger Spacing for Single and Tandem Leaf Spring Axles.
Step 4: Inspect worn suspension parts
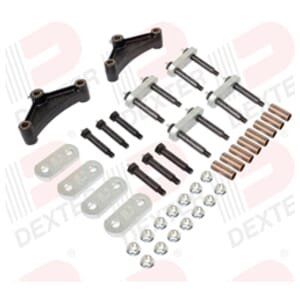
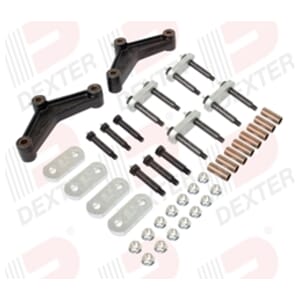
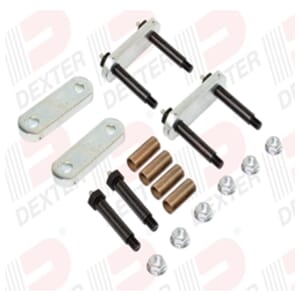
On a leaf spring axle, the springs, hangers, shackles, bolts and equalizers hold the axle in place. On a tandem, the equalizer transfers load from one axle to the other. When those parts wear, the axle can shift. For what to check before ordering replacements, see Replacing Trailer Shackles, Hangers and Equalizers.
Dexter's service manual, page 66, says to visually inspect all suspension components at least every 6,000 miles for:
- Signs of excess wear
- Elongation of bolt holes
- Loosening of fasteners
The same page says wet bolts and equalizers should be greased every 3,000 miles, and that loose or replaced suspension fasteners should be torqued to Dexter's chart. Non-shoulder shackle bolts, spring eye bolts and equalizer bolts with 9/16" threads are snug fit only, and the parts must rotate freely. Shoulder type shackle bolts with 7/16" threads are 30 to 50 ft. lbs.
Dexter's applications guide adds:
- All Dexter axles are directional. Install them with the front of the axle facing forward and the top facing up (LIT-008-00, page 12).
- Spring eyes and equalizers must be free to rotate. Binding can lead to unsatisfactory ride performance and possible spring failure (page 12).
- Drive shouldered shackle bolts into place so the serrations grip the hanger. Do not use the nut to pull the bolt in. Shackle bolts that are free to rotate will severely limit the service life of the hangers (page 13).
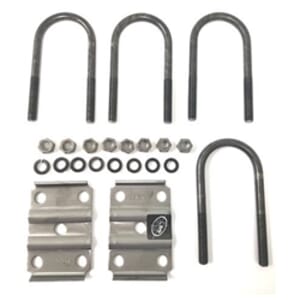
U-bolts are part of the same inspection. For U-bolt sizes and torque, see U-Bolt Torque and Replacement for Trailer Axles.
When to have alignment checked professionally
Take the trailer to an alignment shop when:
- The tires show side wear or toe wear. That is Dexter's chart action for both.
- Pressure, load, bearings and brakes are right, and the wear keeps coming back.
- Your axle measurements are out of Dexter's limits and you cannot find a worn or misplaced part that explains it.
- The axle may have been hit or bent and you want it checked before you decide to replace it.
Note that Dexter's limited warranty does not cover defects caused by improper alignment (service manual, page 85).
When replacing the axle makes sense
Replace the axle when the beam itself is the problem: it is damaged or bent, or it is the wrong size, capacity, hub face or spring center for the trailer. Replacing it will not fix pressure, load, worn suspension parts, loose bearings, or a hanger in the wrong place. Fix those first, or the new axle will wear tires the same way.
When you do replace it, match the old axle's size and capacity whenever possible. Our identification guide covers what to measure and how to order: How to Identify Your Old Trailer Axle and Order a Dexter Replacement. For measuring hub face and spring center, see How to Measure for a Custom Built Dexter Trailer Axle.
Before you replace an axle: checklist
- Identify the wear pattern on every tire.
- Set tire pressure cold, to the tire maker's recommendation for the load.
- Confirm the load does not exceed the axle rating.
- For cupping, check bearing adjustment and tire balance.
- For flat spots, check brake adjustment.
- Measure axle position from a reference that is square to the trailer centerline.
- On a tandem or triple, check that the axles are parallel.
- Inspect hangers, shackles, bolts, bushings, equalizers, springs and U-bolts for wear, elongated holes and loose fasteners.
- Confirm the axle is installed front forward and top up.
- For side or toe wear that remains, have alignment checked at an alignment shop.
Frequently asked questions
Does uneven tire wear mean my trailer axle is bent?
Not by itself. Dexter's Tire Wear Diagnostic Chart ties center and edge wear to inflation, cupping to balance and bearing adjustment, and flat spots to wheel lockup. Side wear and toe wear are the patterns Dexter sends to an alignment shop.
What causes wear on the inside or outside edge of one tire?
Dexter's chart lists side wear as loss of camber or overloading. Make sure the load does not exceed the axle rating, then have alignment checked at an alignment shop.
How square does a trailer axle have to be?
Dexter's applications guide, LIT-008-00 page 19, says the axle must be perpendicular to the trailer centerline within plus or minus 1/2 degree, and multiple axles must be parallel within 1/16 inch measured at the wheel centers.
Can I measure from the front cross member?
Only if the cross member has been checked for squareness to the frame centerline. Dexter says any error in the cross member is transferred to the axle and can cause poor tracking and excessive tire wear.
Is camber the same as alignment?
No. Camber is an arch built into the axle tube at the factory so the tires stand more upright when loaded. Alignment is how the axle is placed on the trailer. Toe is whether the tires point in or out.
Can worn hangers or shackles cause tire wear?
Worn parts can let the axle sit out of square. Dexter says to inspect suspension parts at least every 6,000 miles for excess wear, elongated bolt holes and loose fasteners, and that shackle bolts free to rotate will severely limit hanger life.
How often should I check tire pressure?
Dexter says to check it weekly while the trailer is in use, cold, before you tow.
Will a new axle fix my tire wear?
Only if the old beam was the cause. If the wear comes from pressure, load, bearings, brakes, worn suspension parts or a hanger in the wrong place, a new axle will wear tires the same way.
Need plain-English definitions? See Trailer Axle Terms: A Plain-English Glossary.
Building the whole axle? See Build a Complete Dexter Trailer Axle.
Ready to replace the axle?
Build a Custom Dexter Trailer Axle
Need a stock size? See Pre-Configured Dexter Trailer Axles or call Southwest Wheel at 1-800-866-3336.
Southwest Wheel - Your Trailers Best Friend Since 1919.
References
- Dexter 2,000 - 8,000 lbs. Axle Service Manual: page 63 (Axle and Suspension Installation: installer responsibility, 1/16 inch and 1/8 inch alignment limits), page 64 (Double Eye Leaf Springs: equalizer), page 66 (Inspection and Replacement; Suspension Fastener Torque Values), pages 69 and 70 (support cautions; plumb line measuring), page 75 (Tires: inflation pressure), page 76 (Tire Wear Diagnostic Chart), page 85 (Limited Warranty exclusions: improper alignment).
- LIT-008-00, Dexter Axle applications guide, page 12 (Installation Suggestions: directional axles; spring eyes and equalizers free to rotate), page 13 (Installation Suggestions: shackle bolts), page 19 (Axle Alignment).
- Trailer Axle Terminology, page 2 (Track), page 4 (Camber).
Shop Related Products: Trailer Axle Alignment and Uneven Tire Wear: What to Check Before Replacing an Axle
Regular Price:
$122.38
Now:
$109.26


